
Fall Property Preparation: Painting, Waterproofing, and Repairs for Bay Area Homes
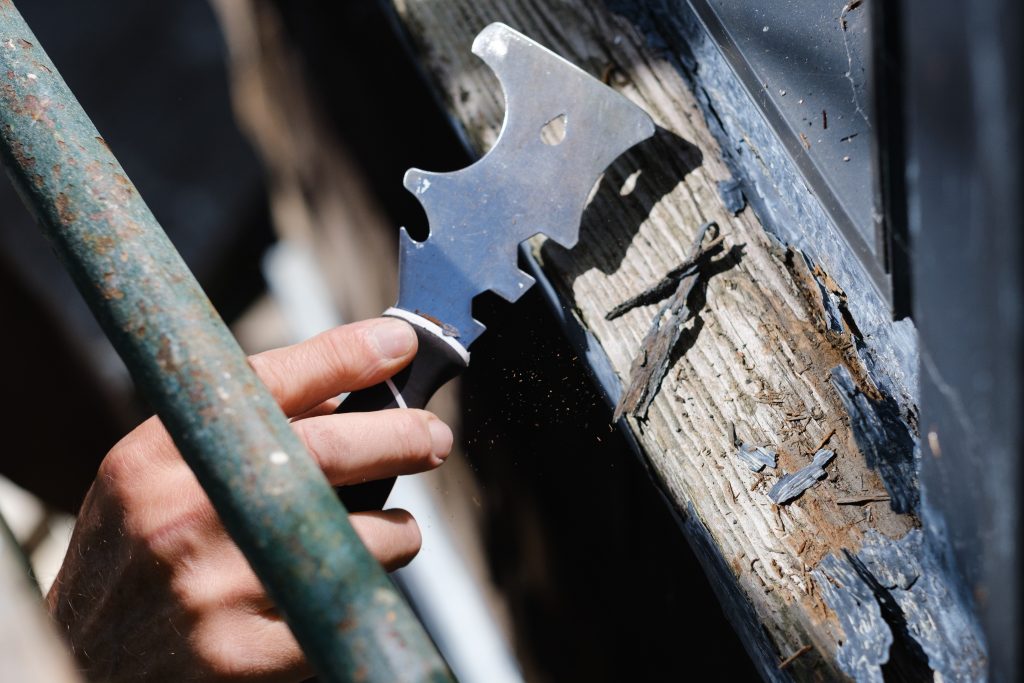
A small patch of peeling paint is easy to ignore. So is a thin crack beside a window or a section of trim that feels a bit softer than it should. During the dry months, these issues rarely seem urgent. Once the rain hits, however, a minor cosmetic flaw can quickly turn into a costly moisture problem.
After more than 35 years of working on homes and commercial properties throughout the San Francisco Bay Area, I’ve learned that September is the sweet spot to slow down and inspect your building’s exterior. You don’t need to be a construction expert, you just need to know what deserves attention before wet weather arrives. Good fall preparation isn’t about looking for excuses to start a massive project; it’s about catching manageable problems while you still have choices.
Why September Is the Ideal Time to Inspect
Bay Area properties face a unique mix of microclimates. Coastal fog and high humidity constantly impact homes in San Francisco and Marin County, while intense sun and warm temperatures take a toll on exterior finishes in San Mateo County and the East Bay.
Paint, caulk, wood, stucco, and waterproof coatings naturally expand, contract, and age under these shifting conditions. Older properties, especially those with decorative trim, wood siding, balconies, or previous spot repairs, require an even closer eye. Inspecting these materials in September gives you time to address vulnerabilities before seasonal rains make them far more difficult to fix.
“An ounce of prevention is worth a pound of cure.”
- Benjamin Franklin
While he was referring to fire safety, the principle fits property maintenance just as well. A little attention today prevents a major repair tomorrow.
Start With Exterior Paint
Exterior paint isn’t just about curb appeal. When the surface is properly prepared and the right coating is applied, paint acts as a protective shield for siding, trim, stucco, and structural elements against sun and rain. Walk your property and look for these warning signs:
- Peeling, flaking, or cracking paint
- Bubbling beneath the surface
- Bare or exposed wood
- Open seams in siding or trim
- Heavy fading on walls facing direct sun
- Dark staining below windows or rooflines
- Paint separation around decks and balconies
A few isolated hairline cracks might only need a quick spot repair, but widespread peeling or exposed timber usually signals that a larger section needs attention.
Paint manufacturers constantly stress the value of surface preparation. Benjamin Moore emphasizes that exterior surfaces must be clean, dry, and structurally sound before applying a new coat, and strongly advises finding and fixing the root cause of peeling rather than simply painting over it.
Look Beyond Peeling Paint
One of the most common mistakes I see is treating failed paint as if the paint itself is the only issue. Sometimes a coating has simply reached the end of its lifespan. More often, though, peeling paint is a symptom of water creeping in from a failed joint, damaged roofline, cracked stucco, or poorly sealed window.
Sherwin-Williams notes that exterior paint loses adhesion when moisture causes the underlying surface to swell. Worn caulking, roof leaks, and moisture migrating through exterior walls are frequent culprits.
My background in engineering taught me to follow the trail of a problem. If paint repeatedly fails in the exact same spot, repainting it without fixing the water source will never yield a lasting solution. The visible damage tells you where to look, not necessarily where the problem started.
Check for Dry Rot and Wood Damage
Exterior wood trim gives Bay Area homes their distinct character, especially historic Victorians, Edwardians, and Craftsman properties. However, wood needs continuous protection from standing moisture. Focus your inspection on high-risk areas:
- Window sills, frames, and door thresholds
- Fascia boards, eaves, and roof edges
- Deck boards, posts, and railings
- Siding close to soil or planters
- Decorative architectural woodwork
- Materials directly beneath gutters and downspouts
Key indicators of damage include soft or spongy wood, cracking, crumbling edges, discoloration, and paint that refuses to stick. Feel free to perform a gentle visual and touch inspection, but avoid aggressively probing the wood yourself. Surface rot doesn’t always show how deep the damage goes, and a professional can determine whether you need a simple carpentry patch or a full section replacement.
Inspect Caulking, Windows, and Doors
Caulk seals the small gaps around windows, doors, trim, siding joints, and material transitions. Over time, UV exposure and natural building movement cause caulk to shrink, split, or pull away.
Look for open seams, missing material, daylight around frames, or caulk that has turned hard and brittle. Pay close attention to the top and side edges of window and door frames, where wind-driven rain easily finds a pathway behind your siding. Small gaps are straightforward to reseal when the surrounding substrate is dry and healthy. But if the wood is already soft or the wall shows staining, address those underlying repairs first.
Examine Stucco, Plaster, and Interior Walls
Not every crack points to serious structural settling. Minor hairline cracks can develop naturally as materials age. However, even small cracks should be monitored because they allow driven rain to soak into the underlying substrate. Watch out for:
- Cracks that are widening or branching
- Loose, bulging, or flaking stucco
- Bubbling exterior paint
- White, powdery mineral deposits (efflorescence)
- Dark water stains after fog or rain
- Stained or discolored interior drywall and plaster
- Musty odors near exterior-facing walls
Keep in mind that interior water stains frequently appear far from the actual leak. Water easily travels along framing studs, plumbing, and subfloors before showing up on a ceiling or wall. The EPA’s guidance on moisture control emphasizes that controlling how water enters and moves through a structure is critical; finding that entry pathway is always more important than just patching the interior stain.
Make Waterproofing Part of Fall Prep
Waterproofing isn’t just a single product you slap on a surface. It’s a complete system of coatings, sealants, flashing, drainage, and properly detailed transitions designed to shed water safely away from vulnerable materials. Key areas to check include:
- Decks, balconies, and elevated walkways
- Exterior stairs and landings
- Window and door flashing
- Wall penetrations (pipes, vents, fixtures)
- Stucco-to-wood transitions
- Roof-to-wall intersections
Ponding water, cracked deck coatings, dried-out sealant, and pulled joints all require prompt action. Waterproofing failures almost always start at edges and seam transitions, not in the middle of a flat surface.
Repair Before You Repaint
A durable, long-lasting exterior painting project always follows a logical sequence:
- Locate and eliminate the moisture entry point.
- Allow all affected materials to dry out completely.
- Repair or replace damaged wood, stucco, plaster, or structural framing.
- Replace failed caulk and seal open joints.
- Thoroughly clean, prepare, and prime all repaired surfaces.
- Apply high-quality exterior finish coats.
Slapping paint over unresolved damage might look good for a few weeks, but it ultimately traps moisture and hides rot underneath. Good craftsmanship starts below the topcoat. As I always remind clients:
“Your Bay Area property is likely your largest investment, don’t let deferred maintenance turn small fixes into major expenses.”
Fall Property Inspection Checklist
Set aside 20 to 30 minutes to walk your property and run through this quick checklist:
- Exterior Paint: Check for peeling, bubbling, fading, or exposed material.
- Wood Trim: Test for softness, cracking, or dark discoloration.
- Caulking: Inspect window, door, and siding seams for gaps or brittle seals.
- Stucco & Walls: Look for open cracks, bulging spots, or mineral deposits.
- Decks & Balconies: Check for worn topcoats, peeling membranes, or standing water.
- Gutters & Drainage: Clear out leaves, debris, and blocked downspouts.
- Interior Surfaces: Scan exterior-facing walls and ceilings for spots or peeling paint.
- Windows & Doors: Inspect interior frames for water marks or drafty gaps.
Tip: Snap photos of any problem areas. Pictures make it much easier to track whether a crack, stain, or peeling spot is worsening over time.
You can easily handle basic cleaning, visual checks, and ground-level maintenance yourself. However, call an experienced professional when repairs involve heights, soft structural wood, widespread paint failure, active water leaks, or issues you can’t clearly diagnose.
Protect Your Property Before Small Issues Grow
A well-maintained building doesn’t need to be flawless, it just needs to be regularly inspected, understood, and repaired in the right order.
That has been my approach from my early days as an engineer through more than three decades of painting, carpentry, waterproofing, and restoration across the Bay Area: fix the source, repair the damage, and apply a proper finish. Regular, proactive maintenance always costs a fraction of an emergency repair.
If you’d like an experienced second opinion on your home or commercial property, Zidan Construction & Painting is always happy to help you review your options before minor issues turn into expensive headaches.